
Discover how critical laboratory checks reduce remakes and improve restoration quality in dental lab outsourcing for fixed and implant cases.
Table of contents [Show]
- Why Critical Laboratory Checks Matter
- Master QC Table For Fixed Prosthodontic Restorations
- Marginal Integrity
- Internal Fit
- Proximal Contact
- Occlusal Contact
- Anatomy
- Shade
- Surface Texture
- Connector Dimensions
- Pontic Design
- Emergence Profile
- Screw Access Position When Relevant
- Cleanability
- Fixed Restoration QC Workflow
- Practical QC Form For Dental Laboratories
- Critical Checks By Restoration Type
- Common Defects And Likely Root Causes
- Recommended Inspection Tools
- Why These Checks Matter In Dental Lab Outsourcing
- International Standards And Quality Considerations
- Key Takeaways
Critical laboratory checks are the final quality-control steps performed before a fixed restoration leaves the dental laboratory. These checks are essential for crowns, bridges, veneers, inlays, onlays, implant crowns, implant bridges, and full-arch fixed prostheses. Their purpose is not just to confirm esthetics. They help verify that the restoration will seat correctly, function properly, remain cleanable, support soft tissue health, and match the prescription.
In practical terms, these checks help prevent remakes, open margins, weak contacts, food impaction, ceramic fracture, peri-implant inflammation, occlusal trauma, and patient dissatisfaction. A restoration can look excellent on the bench and still fail clinically if its fit, contour, or occlusion is wrong. That is why final laboratory inspection must be mechanical, biological, and prosthodontic, not merely visual.
Why Critical Laboratory Checks Matter
A fixed prosthodontic restoration is a patient-specific medical device. Before delivery, the laboratory should verify that it is accurate, functional, biologically compatible, cleanable, and consistent with the prescription.
Core Checks Before Delivery
The lab should confirm:
- Marginal integrity
- Internal fit
- Proximal contact
- Occlusal contact
- Anatomy
- Shade
- Surface texture
- Connector dimensions
- Pontic design
- Emergence profile
- Screw access position when relevant
- Cleanability
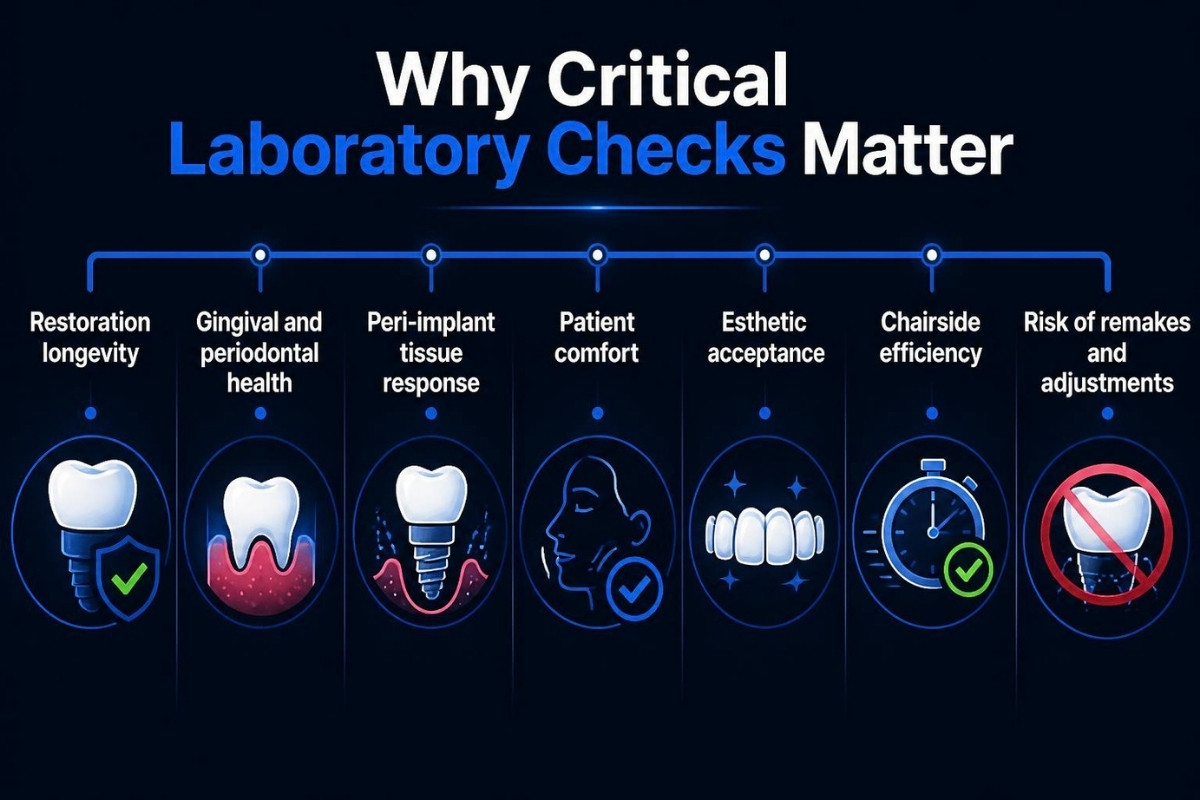
Why These Checks Affect Outcomes
- Restoration longevity
- Gingival and periodontal health
- Peri-implant tissue response
- Patient comfort
- Esthetic acceptance
- Chairside efficiency
- Risk of remakes and adjustments
A final inspection is not the last polish. It is the last line of defense.
Master QC Table For Fixed Prosthodontic Restorations
Below is a practical summary of the most important checks and why they matter clinically.
| Critical Check | What The Lab Verifies | Why It Matters Clinically |
|---|---|---|
| Marginal integrity | Closed, smooth, intact margin | Prevents leakage, caries, cement washout, gingival irritation |
| Internal fit | Complete seating, correct relief | Prevents high occlusion, open margins, cement-space problems |
| Proximal contact | Correct tightness and location | Prevents food impaction and tooth movement |
| Occlusal contact | Correct intensity and position | Prevents fracture, sensitivity, mobility, porcelain chipping |
| Anatomy | Natural contour and morphology | Supports esthetics, function, speech, and hygiene |
| Shade | Match with prescription and photos | Prevents esthetic remake |
| Surface texture | Smooth but natural | Reduces plaque retention and improves esthetics |
| Connector dimensions | Adequate height and width | Prevents bridge fracture |
| Pontic design | Tissue-compatible and cleanable | Protects ridge tissue and hygiene access |
| Emergence profile | Natural, not over-contoured | Supports gingival and peri-implant health |
| Screw access | Correct position and angulation | Supports retrievability, strength, and esthetics |
| Cleanability | Patient can realistically clean the restoration | Reduces caries, gingivitis, and peri-implantitis risk |
Marginal Integrity
Marginal integrity is one of the most important indicators of clinical success. A restoration margin should adapt closely to the finish line without being open, short, overextended, rough, or chipped.
What The Lab Should Check
- Complete seating on the die or model
- A closed margin around 360 degrees
- No rocking on the die
- No visible open margin
- No overhanging edge
- No short margin
- No chipped ceramic at the margin
- No rough or sharp edge
- No internal interference that blocks seating
- No distortion after pressing, firing, sintering, or casting
Why Marginal Integrity Matters
- Microleakage
- Cement dissolution
- Secondary caries
- Gingival inflammation
- Plaque retention
- Sensitivity
- Loss of retention
- Clinical remake
Inspection Methods
- Visual inspection under magnification
- Explorer check at the die margin
- Silicone fit checker
- Microscope inspection
- Digital cross-section analysis
- Verification on a printed or stone model
- Seating check before and after firing or sintering
Practical Standard
The restoration should not be released if:
- The margin visibly gaps on the die
- The restoration rocks
- The margin is chipped
- Internal interference prevents full seating
- The finish line remains uncertain and the case is not clarified
When the margin is questionable, polishing is not a strategy. It is camouflage with extra steps.
Internal Fit
Internal fit describes how the intaglio surface of the restoration relates to the prepared tooth or implant abutment.
What The Lab Should Verify
- Complete seating on the die or abutment
- Proper cement space
- No internal nodules
- No milling debris
- No resin residue
- No unsupported thin areas
- No binding at line angles
- Correct relief near axial and occlusal surfaces
- No interference at grooves, boxes, or sharp preparation areas
Why Internal Fit Matters
- Incomplete seating
- Open margins
- High occlusion
- Excess cement thickness
- Post-cementation sensitivity
- Fracture under load
- Delayed chairside delivery
- Loss of retention
Common Causes Of Poor Fit
| Cause | Typical Result |
|---|---|
| Incorrect die spacer | Tight fit or weak retention |
| Stone bubble on die | Internal binding |
| Milling bur wear | Inaccurate intaglio surface |
| Wrong cement-gap setting | Seating or retention issue |
| Sharp tooth preparation | Internal stress concentration |
| Sintering distortion | Fit discrepancy |
| Ceramic firing distortion | Rocking or open margin |
| Resin print shrinkage | Poor seating |
Inspection Methods
Use:
- Fit-checker silicone
- Pressure-indicating spray
- Magnification
- Internal surface scan comparison
- Try-in on die or model
- Implant analog verification
- Contact indicator paste
Internal adjustment should be conservative. A crown that seats beautifully because the intaglio was over-relieved may look cooperative while quietly reducing retention.
Proximal Contact
Proximal contact is essential for food deflection, arch stability, and patient comfort.
What The Lab Should Check
- A definite contact
- No open contact
- No excessively tight contact
- Correct anatomical contact location
- Broad enough contact shape in posterior teeth
- No contact that blocks seating
- Floss passage with slight resistance
- Hygienic embrasure form
Why Proximal Contact Matters
- Food impaction
- Gingival inflammation
- Patient discomfort
- Tooth migration
- Seating difficulty
- Excess chairside adjustment
- Remake risk
Ideal Contact Characteristics
| Region | Preferred Contact Character |
|---|---|
| Anterior | Smaller and more incisally positioned contact |
| Premolar | Moderate contact, slightly buccal to center |
| Molar | Broader contact with stronger food deflection |
| Implant crown | Often slightly stronger due to lack of PDL movement |
| Bridge | Contact must not distort path of insertion |
Laboratory Tools
- Dental floss
- Shimstock
- Contact spray
- Articulating film
- Model verification
- CAD contact analysis
- Magnification
A contact should be firm, not heroic. If it fights the model, it will stage a full rebellion in the operatory.
Occlusal Contact
Occlusal contact must be controlled carefully because occlusal error can damage the restoration, the abutment, the implant components, or the opposing dentition.
What To Evaluate
- Static occlusal contacts
- Excursive contacts
- Working-side contacts
- Non-working interferences
- Protrusive guidance
- Occlusal clearance
- Contact intensity
- Contact location
- Material thickness at contact areas
- Opposing restorative material
Why Occlusal Control Matters
- Ceramic fracture
- Porcelain chipping
- Opposing enamel wear
- Tooth sensitivity
- Periodontal trauma
- Implant screw loosening
- Implant component fracture
- Patient discomfort
High-Risk Occlusal Situations
- Bruxism
- Implant crowns
- Cantilever bridges
- Long-span bridges
- Deep bite
- Full-mouth rehabilitation
- Severe wear cases
- Opposing ceramic restorations
- Limited restorative space
- Endodontically treated abutments
QC Methods
The lab may use:
- Mounted casts
- Articulating paper
- Shimstock
- Excursive movement checks
- CAD occlusal map
- Virtual articulator
- Physical model verification
- Silicone index from diagnostic wax-up
The lab should not send a restoration that obviously requires aggressive grinding at insertion. That is not adjustment. That is outsourcing the problem.
Anatomy
Anatomy includes contour, morphology, line angles, embrasures, and functional design.
What The Lab Should Inspect
- Cusp form
- Fossa anatomy
- Marginal ridges
- Contact areas
- Buccal and lingual contours
- Incisal edge position
- Line angles
- Embrasures
- Pontic form
- Gingival contour
- Symmetry with adjacent teeth
- Harmony with the opposing arch
Why Anatomy Matters
- Mastication
- Esthetics
- Speech
- Lip and cheek support
- Food deflection
- Cleanability
- Occlusal stability
- Gingival health
Common Anatomy Errors
| Error | Clinical Consequence |
|---|---|
| Over-contoured crown | Plaque retention and gingival inflammation |
| Under-contoured crown | Food trapping and weak esthetics |
| Flat occlusal anatomy | Reduced function and poor food control |
| Excessively steep cusps | Occlusal interference |
| Poor embrasure form | Hygiene difficulty |
| Incorrect incisal edge | Speech and esthetic issues |
| Bulky lingual contour | Tongue discomfort |
Good anatomy looks natural, functions smoothly, and does not create cleaning challenges disguised as contours.
Shade
Shade verification is essential for esthetic success, especially in anterior restorations.
What The Lab Should Verify
- Basic shade
- Chroma
- Value
- Translucency
- Stump shade influence
- Incisal effects
- Cervical color
- Surface texture
- Fluorescence
- Opalescence
- Characterization
- Lighting conditions
- Dehydration risk in photos
Shade Information Needed From The Clinic
- Shade tab photo next to the tooth
- Cross-polarized photo
- Stump shade information
- Final shade target
- Preparation shade
- Photos from multiple angles
- Patient age and characterization preference
- Existing material if matching a single crown
Why Shade Matters
- Esthetic remake
- Patient dissatisfaction
- Chairside staining attempts
- Loss of trust between clinic and lab
Shade QC Methods
Use:
- Standardized shade light
- Shade tabs
- Digital shade devices
- Calibrated clinical photos
- Natural light comparison when possible
- Try-in paste simulation for veneers
- Wet and dry comparison when relevant
In many anterior cases, value matters more than chroma. A crown that is too bright tends to introduce itself before the patient does.
Surface Texture
Surface texture affects both esthetics and biology.
What The Lab Should Inspect
- Appropriate smoothness
- Controlled gloss
- Natural texture
- No scratches
- No pits
- No residual milling marks
- Proper polish on adjusted areas
- Smooth margins
- Smooth tissue-contact surfaces
- Smooth implant emergence areas
Why Surface Texture Matters
- Plaque retention
- Staining
- Gingival inflammation
- Opposing enamel wear
- Patient discomfort
- Biofilm accumulation
Surface Texture By Material
| Material | Surface QC Focus |
|---|---|
| Zirconia | High polish after adjustment; glaze alone may wear |
| Lithium disilicate | Smooth glaze or polish without sharp ceramic edges |
| Feldspathic porcelain | Natural texture without plaque-retentive roughness |
| PFM | Smooth porcelain-metal transition |
| Full metal | High polish, especially margins and occlusal areas |
| PMMA provisional | Smooth polish to reduce staining and plaque |
| Printed resin | Fully cured and smooth without support scars in critical areas |
Inspection Methods
- Visual inspection
- Tactile inspection
- Magnification
- Polishing systems
- Diamond paste
- Steam cleaning
- Surface gloss comparison
Natural texture is welcome. Roughness is not. Plaque does not care whether the contour was artistic.
Connector Dimensions
Connector dimensions are critical in fixed partial dentures and multi-unit restorations.
What The Lab Should Verify
- Connector height
- Connector width
- Cross-sectional area
- Smooth transition between pontic and retainer
- No sharp internal line angles
- No under-designed connector
- Material-specific minimum dimensions
- Adequate gingival embrasure form
- Esthetic integration
Why Connector Dimensions Matter
- Bridge fracture
- Ceramic chipping
- Framework deformation
- Prosthesis failure
- Remake
- Implant prosthesis complications
Connector Design Principles
- Material
- Span length
- Pontic location
- Occlusal load
- Bruxism
- Implant or tooth support
- Anterior or posterior position
- Available vertical space
General Practical Guidance
| Material Or Case | Connector Consideration |
|---|---|
| Zirconia bridge | Requires material-specific connector area, especially posteriorly |
| Lithium disilicate bridge | Limited indications, connector dimensions are critical |
| PFM bridge | Framework must provide rigidity and porcelain support |
| PMMA provisional bridge | Needs generous connector bulk |
| Implant bridge | Requires passive fit and structural rigidity |
| Cantilever | Needs cautious design and strict occlusal control |
When esthetics and engineering disagree at the connector, engineering should win. Fractured beauty has limited clinical value.
Pontic Design
Pontic design influences esthetics, hygiene access, tissue response, phonetics, and patient comfort.
What The Lab Should Evaluate
- Shape
- Tissue contact pressure
- Ridge adaptation
- Cleanability
- Buccal contour
- Lingual contour
- Gingival embrasure
- Esthetic integration
- Food deflection
- Phonetics in anterior cases
Common Pontic Designs
| Pontic Type | Use | Lab QC Focus |
|---|---|---|
| Modified ridge lap | Common esthetic anterior or posterior bridge | Convex tissue surface and cleanable lingual access |
| Ovate pontic | High-esthetic anterior case | Requires appropriate healed ridge or tissue conditioning |
| Hygienic pontic | Posterior mandibular cases | Space beneath for cleaning |
| Conical pontic | Thin mandibular ridge | Small tissue contact and rounded form |
| Ridge lap | Historical use | Often difficult to clean |
| Bullet pontic | Narrow ridge situations | Convex and cleanable form |
Tissue-Surface Rules
The tissue-contact surface should be:
- Smooth
- Convex
- Highly polished
- Appropriately adapted
- Free of concavity
- Easy to clean
- Not excessively compressive
Consequences Of Poor Pontic Design
- Food trapping
- Ridge inflammation
- Ulceration
- Poor esthetics
- Speech problems
- Halitosis
- Patient hygiene difficulty
- Bridge remake
A pontic should look like it belongs there and clean like it knows it is only visiting.
Emergence Profile
Emergence profile describes how the restoration exits the gingiva or peri-implant soft tissue.
What The Lab Should Inspect
- Cervical contour
- Gingival support
- Soft tissue transition
- Subgingival convexity
- Interproximal emergence
- Implant crown emergence
- Tissue pressure
- Cleanability
- Black triangle management
- Esthetic harmony
Why Emergence Profile Matters
- Gingival inflammation
- Recession
- Plaque retention
- Food impaction
- Peri-implant mucositis
- Poor esthetics
- Seating difficulty
- Patient discomfort
Natural Tooth Versus Implant Emergence
| Situation | Emergence Profile Consideration |
|---|---|
| Natural tooth crown | Should follow preparation and gingival architecture |
| Implant crown | Must transition from implant platform to tooth form |
| Anterior implant | Critical for papilla and facial tissue support |
| Posterior implant | Must be cleanable and not overbulked |
| Bridge pontic | Should simulate emergence while preserving hygiene access |
Implant-Specific Concern
Implant crowns are often over-contoured because the implant platform is narrower than the cervical contour of a tooth. The transition must be gradual, polished, and cleanable.
A beautiful implant crown that cannot be cleaned is simply a maintenance issue with excellent photography.
Screw Access Position When Relevant
Screw access is critical for screw-retained implant crowns, bridges, hybrid prostheses, and some screwmentable restorations.
What The Lab Should Verify
- Screw channel exits in an acceptable position
- Access does not weaken the incisal edge or cusp
- Access is not too facial in the esthetic zone
- Access hole diameter is appropriate
- Screwdriver path is unobstructed
- Screw seat is clean
- No ceramic or resin blocks the channel
- Ti-base or abutment interface is clean
- Screw is included when needed
- Angled screw channel compatibility when applicable
Preferred Screw Access Locations
| Restoration | Preferred Screw Access Exit |
|---|---|
| Posterior crown | Central fossa or accessible occlusal area |
| Anterior crown | Cingulum area when possible |
| Full-arch prosthesis | Palatal, lingual, or occlusal access zones |
| Implant bridge | Accessible and structurally safe non-esthetic areas |
Why Screw Access Matters
- Esthetic compromise
- Weak ceramic around the channel
- Maintenance difficulty
- Screwdriver access problems
- Occlusal filling wear
- Fracture around the access opening
- Redesign need
QC Methods
Use:
- Implant CAD library verification
- Screwdriver test
- Analog model test
- Magnification inspection
- Documentation of torque protocol
The screw channel is not a hole to be tolerated. It is the maintenance doorway and has to be planned like one.
Cleanability
Cleanability is one of the most important biological checks and one of the most frequently underestimated.
What The Lab Should Verify
Ask whether the restoration allows:
- Floss or interdental brush access
- A cleanable pontic tissue surface
- Open, non-blocked embrasures
- A hygienic implant emergence profile
- No concave plaque traps
- No rough subgingival surfaces
- No overhanging margins
- Proximal contours that permit cleaning
- Connector and pontic design that supports hygiene aids
Why Cleanability Matters
- Gingivitis
- Periodontitis
- Peri-implant mucositis
- Peri-implantitis
- Secondary caries
- Halitosis
- Food impaction
- Soft tissue inflammation
- Prosthesis failure
Cleanability By Restoration Type
| Restoration Type | Main Cleanability Risk |
|---|---|
| Single crown | Over-contour, rough margin, open contact |
| Bridge | Pontic underside and connector embrasures |
| Implant crown | Overbulked emergence profile |
| Full-arch implant prosthesis | Intaglio access, convexity, embrasure design |
| Veneer | Overhangs and rough margins |
| Inlay or onlay | Marginal ledges and contact tightness |
Practical Lab Test
A useful question is simple:
Can the patient realistically clean this restoration every day?
If the answer is no, the design is not finished.
Fixed Restoration QC Workflow
A structured QC sequence reduces the chance of missed defects.
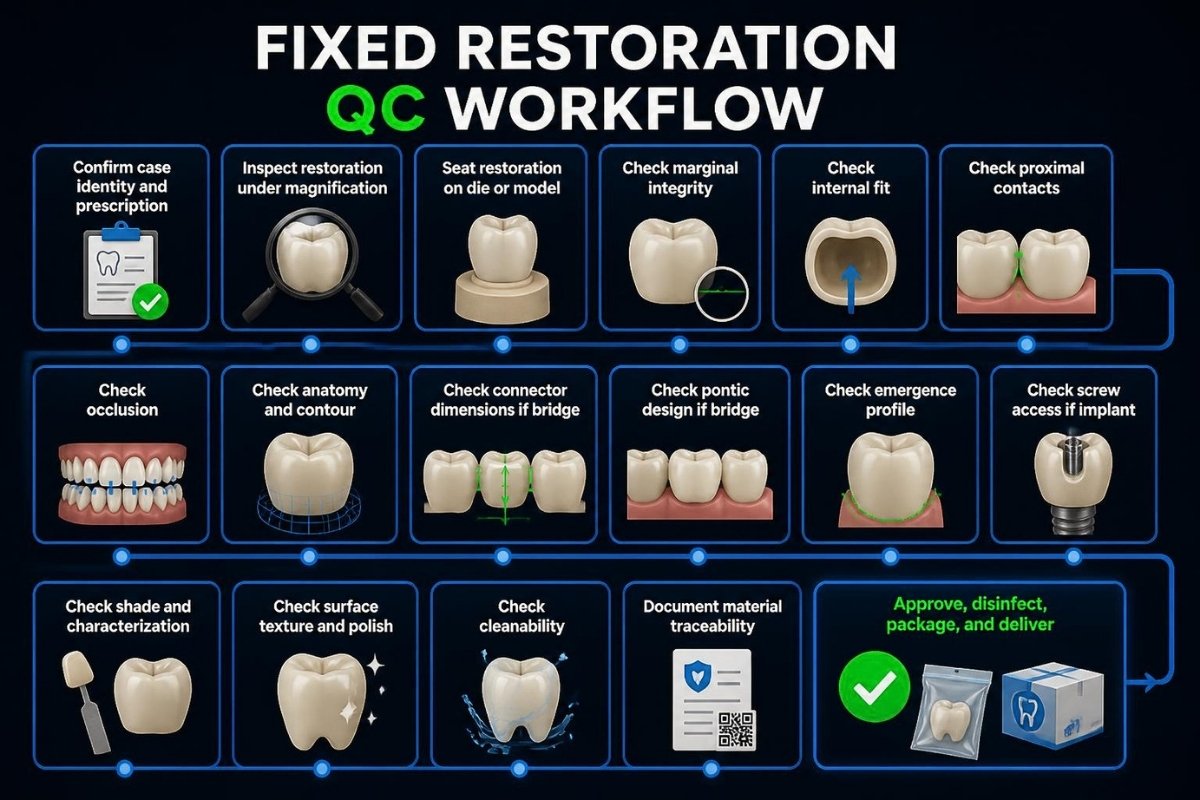
Recommended QC Sequence
- Confirm case identity and prescription
- Inspect restoration under magnification
- Seat restoration on die or model
- Check marginal integrity
- Check internal fit
- Check proximal contacts
- Check occlusion
- Check anatomy and contour
- Check connector dimensions if bridge
- Check pontic design if bridge
- Check emergence profile
- Check screw access if implant
- Check shade and characterization
- Check surface texture and polish
- Check cleanability
- Document material traceability
- Approve, disinfect, package, and deliver
This sequence works for both analog and digital production. The tools change, but the biological and mechanical principles do not.
Practical QC Form For Dental Laboratories
Below is a clean QC template that laboratories can adapt to internal SOPs.
FIXED PROSTHODONTIC RESTORATION QC FORM
Case ID: ___________________________
Patient ID: ________________________
Clinic/Dentist: ____________________
Tooth/Units: _______________________
Restoration Type: __________________
Material: __________________________
Shade: _____________________________
Date: ______________________________
1. CASE VERIFICATION
[ ] Patient/case ID correct
[ ] Tooth number/unit count correct
[ ] Prescription reviewed
[ ] Material matches prescription
[ ] Shade information reviewed
2. FIT AND MARGINS
[ ] Restoration fully seats on die/model
[ ] No rocking
[ ] Margins closed
[ ] Margins smooth
[ ] No chips at margin
[ ] Internal surface clean
[ ] Cement space appears appropriate
3. CONTACTS AND OCCLUSION
[ ] Proximal contacts acceptable
[ ] Floss/shimstock resistance acceptable
[ ] Occlusion checked
[ ] No obvious high contact
[ ] Excursive interferences reviewed where relevant
4. ANATOMY AND CONTOUR
[ ] Anatomy appropriate
[ ] Axial contour not overbulked
[ ] Embrasures hygienic
[ ] Surface texture appropriate
[ ] Restoration polished/glazed correctly
5. SHADE AND ESTHETICS
[ ] Shade matches prescription
[ ] Characterization acceptable
[ ] Incisal/cervical effects acceptable if relevant
[ ] Surface gloss appropriate
6. BRIDGE-SPECIFIC CHECKS
[ ] Connector dimensions adequate
[ ] Pontic design appropriate
[ ] Pontic tissue surface smooth and convex
[ ] Hygiene access acceptable
7. IMPLANT-SPECIFIC CHECKS
[ ] Implant platform/library verified
[ ] Interface clean and undamaged
[ ] Screw access position acceptable
[ ] Screwdriver access confirmed
[ ] Screw included if required
[ ] Emergence profile cleanable
8. FINAL RELEASE
[ ] Cleanability confirmed
[ ] Material lot/batch recorded
[ ] Restoration cleaned/disinfected
[ ] Final inspection approved
[ ] Packaged safely
Technician: ________________________
QC Inspector: ______________________
Signature: _________________________
A written form helps with consistency, training, remake analysis, and quality-system documentation.
Critical Checks By Restoration Type
Different restorations require different inspection priorities. Here is a practical summary.
| Restoration Type | Highest-Priority Checks |
|---|---|
| Single posterior crown | Margins, internal fit, contacts, occlusion, polish |
| Anterior crown | Margin, shade, emergence profile, texture, incisal anatomy |
| Veneer | Margins, shade, thickness, surface texture, fit |
| Inlay/onlay | Internal fit, margins, contacts, occlusion, bonding surface |
| Conventional bridge | Connectors, pontic design, path of insertion, contacts, occlusion |
| Implant crown | Screw access, emergence profile, interface, occlusion, cleanability |
| Implant bridge | Passive fit, screw channels, connector strength, hygiene access |
| Full-arch implant prosthesis | Intaglio contour, cleanability, screw access, occlusion, phonetics |
| Provisional restoration | Tissue support, occlusion, polish, emergence profile, durability |
Common Defects And Likely Root Causes
The table below connects visible problems with likely production causes.
| Observed Defect | Possible Root Cause |
|---|---|
| Open margin | Distorted scan or impression, incorrect margin marking, processing distortion |
| Crown does not seat | Internal nodule, tight cement space, contact too tight, die error |
| Food impaction | Open contact, poor embrasure, incorrect contour |
| High occlusion | Bite record error, mounting error, CAD occlusion error |
| Porcelain chipping | Poor framework support, excessive ceramic thickness, occlusal overload |
| Bridge fracture | Undersized connector, wrong material selection, inadequate restorative space |
| Gingival inflammation | Rough margin, over-contour, poor cleanability |
| Shade mismatch | Poor shade records, wrong opacity, insufficient thickness |
| Implant mucositis risk | Over-contoured emergence, rough subgingival surface, excess cement risk |
| Screw access problem | Implant position issue, abutment design error, CAD library mismatch |
Recommended Inspection Tools
A strong fixed-prosthodontic QC station should include the right instruments, not just a sharp eye.
| Tool | Use |
|---|---|
| Magnification loupes or microscope | Margins, cracks, surface defects |
| Fit-checker silicone | Internal fit |
| Contact spray | Internal and proximal contact detection |
| Shimstock foil | Occlusal and contact verification |
| Articulating paper or film | Occlusal contact marking |
| Dental floss | Proximal contact check |
| Caliper | Connector dimensions and thickness |
| Thickness gauge | Ceramic or zirconia thickness |
| Shade light | Shade verification |
| Steam cleaner | Cleaning before final inspection |
| Polishing kits | Final surface finishing |
| Torque driver | Implant component verification |
| Printed or stone model | Fit, contact, and occlusion verification |
| CAD software section tools | Digital design verification |
| Camera | Documentation and clinic communication |
Why These Checks Matter In Dental Lab Outsourcing
For dental practices using a Vietnam dental lab or lab-to-lab outsourcing partner, critical laboratory checks are a major signal of consistency and reliability.
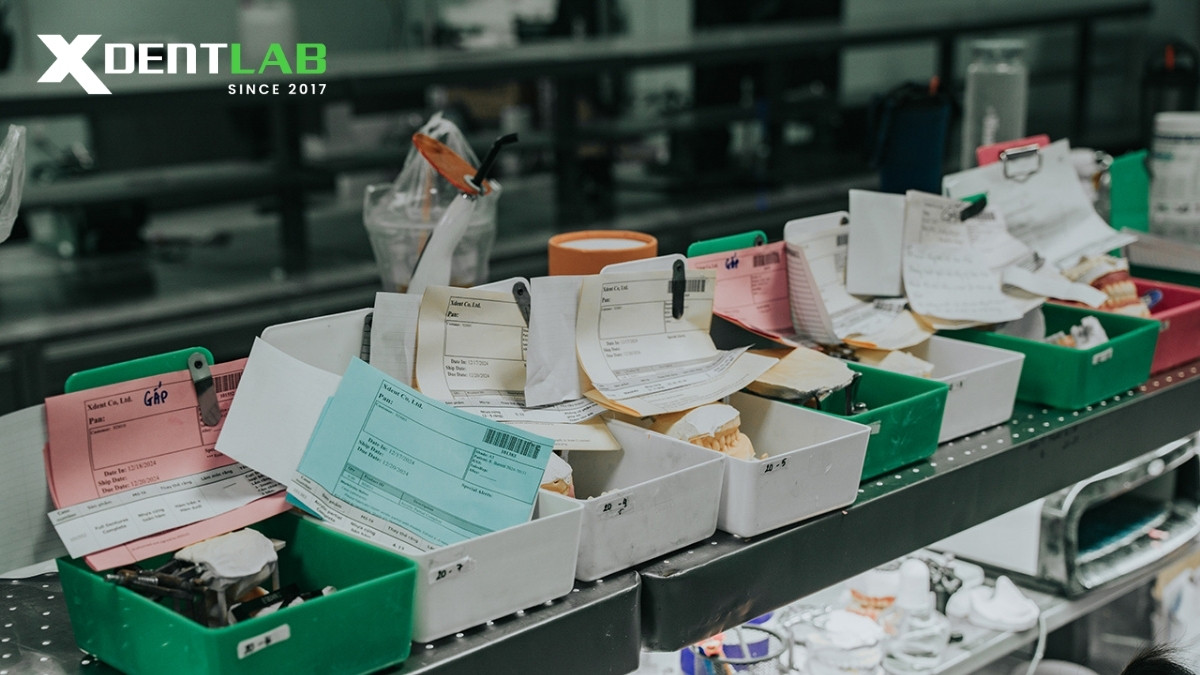
What Practices Should Expect
- Standardized QC protocols
- Clear case verification
- Material traceability
- Digital and analog fit verification methods
- Implant-library accuracy checks
- Shade communication discipline
- Final cleaning, packaging, and documentation
- Consistent communication when scan or prescription quality is unclear
XDENT LAB Positioning
For practices seeking quality and consistency, XDENT LAB’s value in dental lab outsourcing comes from combining:
- Lab-to-lab full service capability
- Certified technicians
- FDA and ISO-aligned quality expectations
- Scalable production through two factories
- Support for removable and implant-related restorations
- Process control designed for the U.S. market
When outsourcing is done well, the clinic experiences it as consistency. When it is done badly, the operatory schedule notices first.
International Standards And Quality Considerations
These checks should be part of a documented quality system, not left to memory or habit.
Relevant Standards And Frameworks
| Standard Or Framework | Relevance To QC Checks |
|---|---|
| ISO 13485 | Medical device quality management and traceability |
| ISO 6872 | Dental ceramic material requirements |
| ISO 22674 | Metallic materials for fixed and removable restorations |
| ISO 10993 series | Biological evaluation of medical devices |
| ISO 7405 | Biocompatibility evaluation for dental materials |
| Manufacturer IFU | Validated processing, sintering, curing, and polishing protocols |
| Local medical device regulations | Custom-made device documentation and accountability |
Documentation The Lab Should Keep
- Case ID
- Prescription
- Material name
- Material lot or batch number
- CAD file or version
- CAM file
- Furnace, sintering, or curing cycle
- Technician name
- QC inspector
- Final approval date
- Remake notes when applicable
Quality control is not only about catching defects. It is also about proving the process was controlled.
Key Takeaways
Critical laboratory checks are the final barrier between a completed restoration and a clinical complication. Before a fixed prosthodontic case leaves the lab, the restoration should be evaluated for margin integrity, internal fit, proximal and occlusal contact, anatomy, shade, surface texture, connector dimensions, pontic form, emergence profile, screw access when relevant, and everyday cleanability.
The larger principle is simple: a restoration should not only look good on the bench. It should seat, function, clean well, protect tissues, and remain durable in the mouth. For dental practices working with an outsourcing partner, strong QC systems are one of the clearest indicators of whether a laboratory can deliver consistent restorative outcomes at scale.
About XDENT LAB:
We are experts in Lab-to-Lab Full Service from Vietnam, with the signature services of Removable, meet U.S. market standards, FDA-registered, ISO 13485-certified. Founded in 2017, from local root to global reach, we scale with 2 Factories with over 100+ employees.
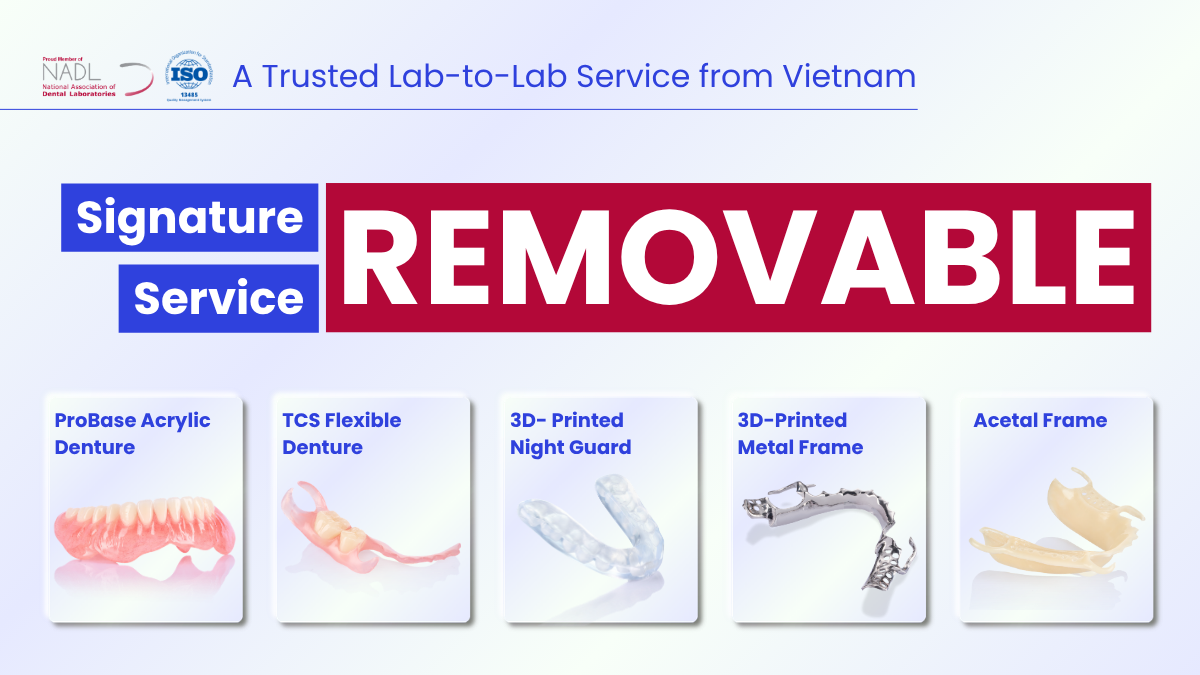
Our Commitments Built on “Trusted. Commitment. Quality”
- Commit to Large-Scale Manufacturing, high volume, remake rate < 1%.
- Commit to 5-Year Warranty
- Commit to Competitive Price
XDENT LAB | A Trusted Lab-to-Lab Service from Vietnam
Share this post:
Related Posts
See 5 completed Acrylic Partial Denture cases (Case 6 ~ Case 10) from XDENT LAB, a Vietnamese dental laboratory that is FDA registered and ISO 13485 certified. A trusted overseas outsourcing dental la...
Understanding and applying the correct Layer Thickness settings not only saves labs time and production cost, but also ensures stable output quality for each specific type of dental product.
A technical guide to post curing in digital denture fabrication, helping dental lab technicians understand the parameters for consistent product quality.

