
Learn how conventional lab workflow supports fixed prosthodontics through precise steps, material control, quality checks, and consistent dental restoration results.
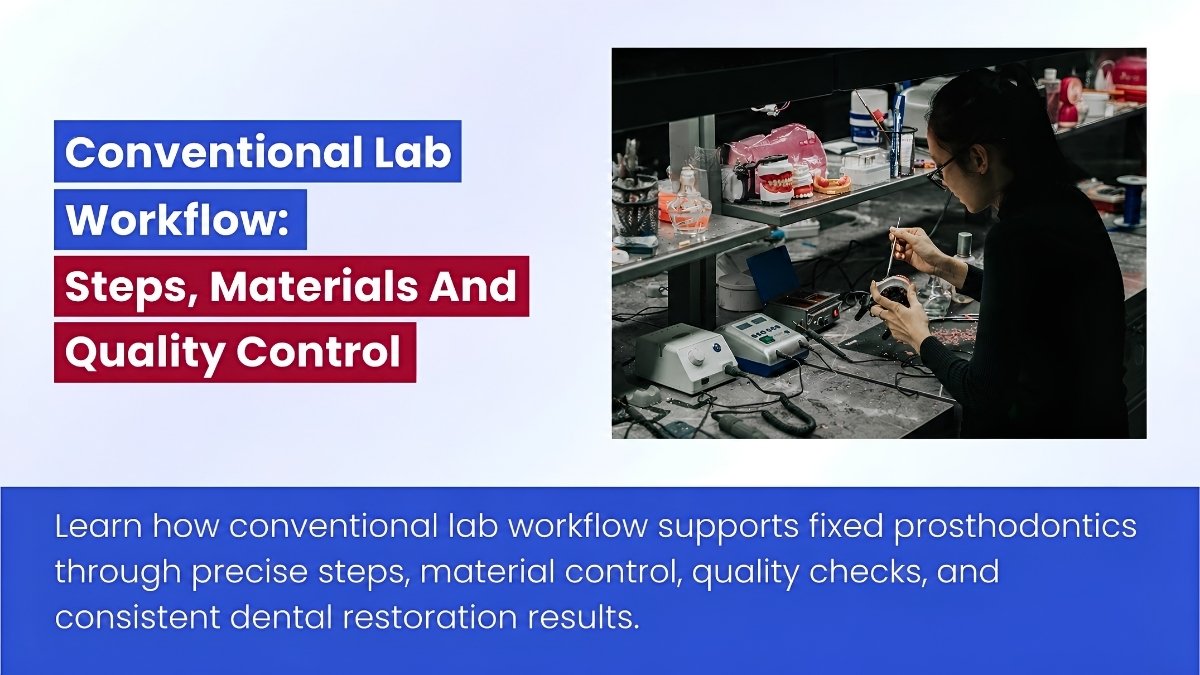
Table of contents [Show]
- What Conventional Lab Workflow Means
- Overview Of The Conventional Fixed Prosthodontic Workflow
-
Step-By-Step Conventional Lab Workflow
- Step 1: Receive Impression And Prescription
- Step 2: Disinfect Impression
- Step 3: Pour Working Cast
- Step 4: Fabricate Dies
- Step 5: Mount Models
- Step 6: Wax The Restoration
- Step 7: Cast, Press, Or Scan
- Step 8: Build Framework
- Step 9: Layer Ceramic Or Shape Monolithic Form
- Step 10: Finish And Polish
- Step 11: Perform Quality Control
- Step 12: Return To Clinic
- Materials And Equipment Used In Conventional Workflows
- Quality Risks In Conventional Lab Workflow
- Infection Control And Asepsis In The Lab
- Conventional Vs Digital And Hybrid Workflow
- Why Conventional Workflow Matters For Dental Lab Outsourcing
- Key Takeaways
Conventional lab workflow is the traditional process dental laboratories use to convert a clinical impression, bite registration, and prescription into a fixed prosthodontic restoration such as a crown, bridge, veneer, inlay, onlay, or framework. Even in modern laboratories that use CAD/CAM systems, this analog pathway still matters because it teaches the core logic of precision, fit, material control, and occlusal accuracy. In fixed prosthodontics, every step builds on the previous one, so a small error at the impression stage can become a major clinical problem by delivery day.
For dental practices, understanding the conventional lab workflow helps clarify why restorative quality depends not only on materials or equipment, but also on laboratory discipline. For dental laboratories, it remains one of the clearest examples of how craftsmanship and process control work together. The workflow is not just a production sequence. It is a chain of accuracy that transforms clinical records into a patient-specific medical device.
What Conventional Lab Workflow Means
Conventional lab workflow refers to the physical, model-based process of fabricating indirect restorations outside the mouth using impressions, gypsum casts, removable dies, articulators, wax patterns, and material processing techniques such as casting, pressing, or ceramic layering.
Why It Is Still Important
Even in digital dentistry, conventional methods remain relevant because they:
- Teach the fundamentals of margin interpretation
- Develop understanding of occlusion and articulation
- Build technician skill in contour, contact, and anatomy
- Support hybrid workflows that begin with physical impressions
- Provide practical backup when digital records are incomplete or unclear
This makes conventional workflow especially useful in fixed prosthodontics, where precision at each stage directly affects fit, function, and biological compatibility.
Typical Restorations Made Through Conventional Workflow
Common examples include:
- Full metal crowns
- Porcelain-fused-to-metal crowns
- Conventional bridges
- Veneers
- Inlays and onlays
- Post-and-core restorations
- Implant-supported frameworks
- Pressable ceramic restorations
Overview Of The Conventional Fixed Prosthodontic Workflow
The classic workflow follows a structured sequence. Each stage must be performed carefully because errors tend to accumulate rather than disappear.
Standard Workflow Sequence
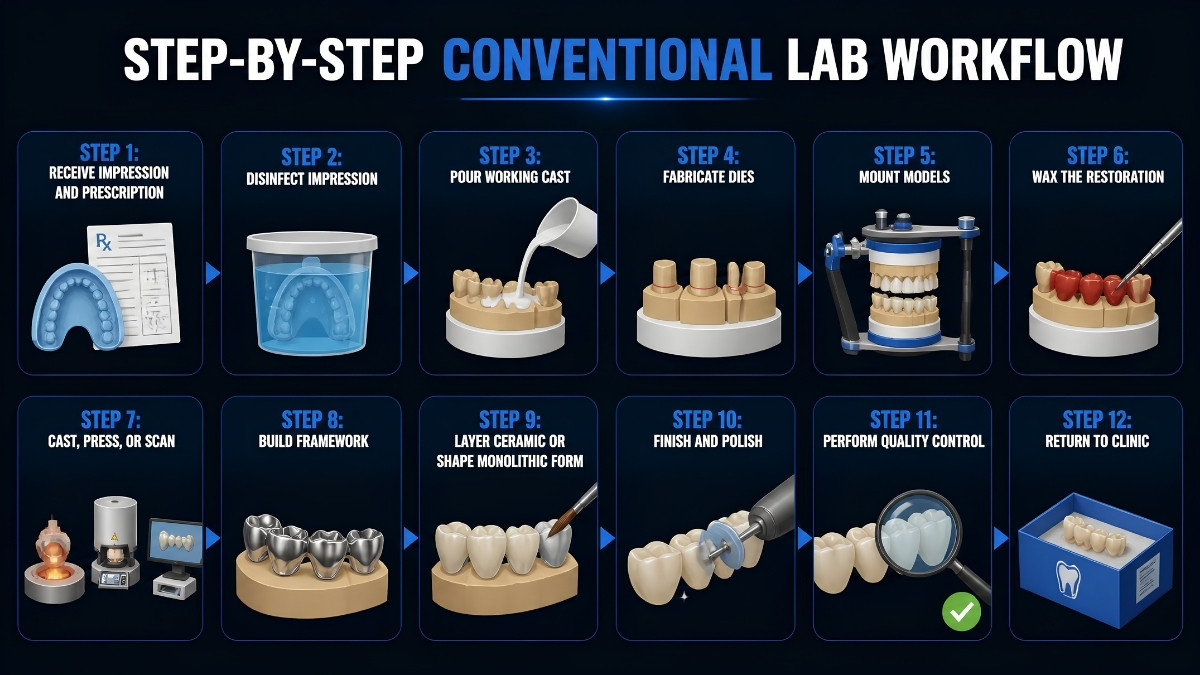
The conventional process usually includes:
- Receive impression and prescription
- Disinfect impression
- Pour working cast
- Fabricate dies
- Mount models
- Wax the restoration
- Cast, press, or scan
- Build framework
- Layer ceramic or shape monolithic form
- Finish and polish
- Perform quality control
- Return to clinic
Why Sequence Control Matters
This workflow highlights a simple truth in restorative dentistry:
- A distorted impression creates an inaccurate cast
- An inaccurate cast creates a poor die
- A poor die creates a weak margin or internal fit issue
- A weak pattern or framework affects strength and seating
- Poor finishing and QC can compromise both biology and function
In other words, the restoration can only be as accurate as the chain that created it.
Step-By-Step Conventional Lab Workflow
Below is the practical workflow used in many dental laboratories for fixed restorations.
Step 1: Receive Impression And Prescription
The process begins when the clinic sends a case to the lab.
Items Commonly Included
A case may contain:
- Final impression
- Opposing impression or cast
- Bite registration
- Shade information
- Tooth preparation details
- Clinical photos
- Study models
- Implant components, if relevant
- Written prescription or work authorization
Why The Prescription Matters
The prescription tells the lab what to fabricate, for which tooth, in what material, and with what design requirements.
Important prescription details include:
| Prescription Item | Why It Matters |
|---|---|
| Tooth number | Prevents wrong-site fabrication |
| Restoration type | Defines whether the case is a crown, bridge, veneer, inlay, or other design |
| Material | Guides strength, esthetics, and processing |
| Shade | Controls the visual outcome |
| Pontic design | Affects hygiene and tissue contact |
| Occlusal instructions | Supports function and longevity |
| Cement space preference | Affects seating and retention |
| Special notes | Helps with characterization, contacts, or emergence profile |
Case Acceptance Checklist
Before production begins, the lab should verify:
- Margins are visible
- Impression is not torn or distorted
- Bite registration is stable
- Opposing arch is present
- Shade data is adequate
- Prescription is complete
- Implant parts are correct
- Delivery timeline is realistic
- Patient and clinic details are traceable
If these are missing, the best next step is clarification, not optimism disguised as production.
Step 2: Disinfect Impression
Incoming impressions must be disinfected before laboratory handling.
Why Disinfection Matters
Impressions can carry:
- Saliva
- Blood
- Microorganisms
- Surface biofilm
Disinfection protects staff, couriers, clinicians, and patients while supporting regulatory and quality system compliance.
Common Disinfection Methods
Depending on the impression material, the workflow may involve:
- Rinsing under running water
- Spraying with approved disinfectant
- Controlled immersion in disinfectant
- Following proper contact time
- Rinsing again after disinfection
- Drying before pouring
Impression Material Considerations
| Material | Disinfection Note |
|---|---|
| Polyvinyl siloxane | Generally dimensionally stable |
| Polyether | More sensitive to prolonged immersion |
| Alginate | Less dimensionally stable and should be poured quickly |
| Hydrocolloid | Moisture-sensitive and technique-dependent |
The lab should also document the disinfectant used, the contact time, and who performed the step.
Step 3: Pour Working Cast
After disinfection, the lab pours the impression to produce the working cast.
What The Cast Must Reproduce
The cast should accurately capture:
- Prepared teeth
- Adjacent teeth
- Margin details
- Soft tissue contours
- Edentulous spaces
- Occlusal surfaces
Common Gypsum Materials
| Gypsum Type | Typical Use |
|---|---|
| Type III stone | Study casts and opposing casts |
| Type IV stone | Working casts and dies |
| Type V stone | Higher expansion applications |
Type IV stone is commonly preferred in crown and bridge work because it offers:
- Good strength
- Low expansion
- Better abrasion resistance
- Accurate detail reproduction
Common Pouring Errors
Typical mistakes include:
- Too much water
- Bubbles at margins
- Early separation from the impression
- Poor vibration control
- Incorrect expansion behavior
A cast cannot reproduce detail that the impression never captured. That rule has quietly ruined many crowns before lunch.
Step 4: Fabricate Dies
A die is the exact positive replica of the prepared tooth.
Why The Die Matters
The die allows the technician to:
- Access the finish line
- Check margin adaptation
- Build wax patterns
- Evaluate contours
- Control internal fit
Common Die Systems
| Die System | Description |
|---|---|
| Removable dowel-pin die | Individual tooth section can be removed |
| Pindex system | Precision-drilled pin method |
| Saw-cut die | Sectioned cast around prepared tooth |
| Solid cast with separate die | Used less often in complex fixed cases |
| Epoxy or electroplated die | More specialized systems |
Typical Die Fabrication Steps
These usually include:
- Pour die stone
- Create cast base
- Insert or prepare pins
- Separate cast from impression
- Trim the base
- Section the die
- Trim around the preparation
- Expose the finish line
- Apply die hardener if needed
- Apply die spacer short of the margin
Die Spacer Function
Die spacer creates space for cement. Too much may reduce retention, while too little may prevent full seating.
Step 5: Mount Models
Mounted casts allow the lab to reproduce the patient’s occlusion outside the mouth.
Common Mounting Systems
The lab may use:
- Hinge articulator
- Average-value articulator
- Semi-adjustable articulator
- Fully adjustable articulator in selected cases
Why Mounting Matters
Proper mounting helps the technician control:
- Occlusal contacts
- Functional anatomy
- Cusp height
- Bridge alignment
- Excursive pathways
- Anterior guidance
Poor mounting can create high occlusion, premature contacts, or restorations that look excellent on the bench and rebellious in the mouth.
Step 6: Wax The Restoration
Waxing is the traditional design phase of the restoration.
What The Wax Pattern Defines
The wax-up determines:
- Margin shape
- Internal form
- Proximal contacts
- Occlusal anatomy
- Axial contour
- Connector dimensions
- Pontic design
- Ceramic support in layered cases
Typical Waxing Steps
A technician may:
- Apply die lubricant
- Build the cervical margin
- Develop the full contour or coping
- Shape contacts and embrasures
- Create occlusal anatomy
- Check articulation
- Refine contours
- Smooth the wax surface
- Sprue the pattern for processing
Common Waxing Errors
| Waxing Error | Possible Consequence |
|---|---|
| Open margin | Open final margin |
| Thin coping design | Weak framework or poor support |
| Overcontoured surface | Gingival irritation or plaque accumulation |
| Incorrect contact position | Food impaction or open contact |
| High cusp anatomy | Chairside occlusal adjustment |
| Weak connector | Bridge fracture risk |
Step 7: Cast, Press, Or Scan
After waxing, the restoration moves into material processing.
Casting
Casting is used for:
- Full metal crowns
- PFM frameworks
- Metal bridge frameworks
- Posts and cores
- Implant bars
The sequence generally includes spruing, investing, burnout, alloy melting, casting, divesting, and finishing.
Pressing
Pressing is commonly used for:
- Lithium disilicate crowns
- Veneers
- Inlays and onlays
- Selected anterior restorations
This process usually involves waxing, investing, burnout, pressing the ingot, divesting, and final refinement.
Hybrid Scanning Option
Some analog workflows now transition into digital steps by:
- Pouring the cast
- Fabricating the die
- Scanning the model or die
- Designing digitally
- Milling or printing the restoration or framework
This hybrid model combines conventional records with digital production.
Step 8: Build Framework
The framework is the structural base for many restorations.
Common Framework Materials
These may include:
- Cast metal
- Milled metal
- Zirconia
- Titanium
- Pressed ceramic core
- Resin pattern-derived frameworks
- Fiber-reinforced composite in selected cases
Framework Design Principles
A framework should provide:
- Strength
- Passive fit
- Support for veneering material
- Adequate connector size
- Controlled material thickness
- Proper path of insertion
- Margin adaptation
- Hygienic pontic form
PFM And Zirconia Framework Considerations
PFM frameworks require support for porcelain and rounded internal line angles.
Zirconia frameworks require:
- Proper connector dimensions
- Accurate shrinkage compensation
- Careful sintering control
- Smooth transitions
- Correct support for veneering ceramic when layered
Step 9: Layer Ceramic Or Shape Monolithic Form
At this stage, the restoration gains its final anatomy, shade, and surface character.
Layered Restoration Approach
Layering is common for:
- PFM crowns
- Esthetic anterior restorations
- Layered zirconia restorations
- High-characterization cases
The technician builds the restoration with ceramic powders to mimic natural tooth structure.
Monolithic Restoration Approach
Monolithic restorations are made from one primary material, such as:
- Monolithic zirconia
- Monolithic lithium disilicate
- Full metal
- Hybrid ceramic
These are often preferred in posterior and high-load cases because they reduce chipping risk.
Layered Vs Monolithic Comparison
| Feature | Layered Restoration | Monolithic Restoration |
|---|---|---|
| Esthetics | Highly customizable | Good to excellent depending on material |
| Strength in function | Depends on support design | Often stronger in heavy load |
| Chipping risk | Higher | Lower |
| Lab complexity | Higher | Moderate to high |
| Best use | Anterior esthetics | Posterior strength and efficiency |
Step 10: Finish And Polish
Finishing and polishing directly affect biology, comfort, and long-term performance.
Finishing Includes
- Adjusting contacts
- Refining margins
- Shaping contours
- Correcting occlusion
- Smoothing embrasures
- Removing nodules
- Contouring tissue surfaces
Polishing Includes
- Rubber wheel finishing
- Ceramic polishing systems
- Metal polishing compounds
- Zirconia-specific kits
- High-luster final polishing
Why Surface Quality Matters
A rough restoration can contribute to:
- Plaque accumulation
- Gingival irritation
- Opposing tooth wear
- Tongue discomfort
- Staining
- Additional chairside adjustment
Step 11: Perform Quality Control
Quality control is the final checkpoint before the restoration is dispatched.
Key QC Areas
| QC Area | What To Check |
|---|---|
| Case identification | Patient ID, clinic, tooth number |
| Prescription match | Correct material, shade, design |
| Margins | Closed, smooth, no overhangs |
| Internal fit | Full seating on die |
| Contacts | Not open or excessively tight |
| Occlusion | Correct intensity and location |
| Anatomy | Functional and natural |
| Contour | Cleanable and not overbulked |
| Surface finish | Smooth, polished, or glazed properly |
| Implant interface | Accurate seating and correct components |
| Documentation | Material traceability and final approval |
Common QC Tools
Labs may use:
- Magnification
- Fit checker
- Articulating paper
- Shimstock
- Contact spray
- Silicone disclosing material
- Calipers
- Shade tabs
- Torque drivers for implant cases
A final QC checklist helps catch small issues before they become large chairside conversations.
Step 12: Return To Clinic
The last step is packaging and dispatch.
What Should Be Included
The lab may send:
- Final restoration
- Invoice or work authorization
- Material certificate when needed
- Implant screw if applicable
- Seating notes or cementation recommendations
- Shade notes
- Disinfection confirmation
Packaging Goals
Packaging should protect the restoration from:
- Fracture
- Contamination
- Misidentification
- Moisture damage
- Surface scratches
- Loss of small components
A carefully fabricated veneer can still fail its career if it is packed like a loose coin in a pocket.
Materials And Equipment Used In Conventional Workflows
The conventional workflow depends on a wide range of materials and devices.
Common Materials
| Category | Examples |
|---|---|
| Impression materials | VPS, polyether, alginate, hydrocolloid |
| Disinfectants | Approved dental disinfectants |
| Gypsum | Type III, Type IV, Type V stone |
| Die materials | Stone, resin, electroplated systems |
| Waxes | Inlay wax, margin wax, sprue wax |
| Investments | Phosphate-bonded, gypsum-bonded |
| Alloys | High noble, noble, base metal, cobalt-chromium |
| Ceramics | Feldspathic porcelain, lithium disilicate, zirconia |
| Polishing systems | Rubber wheels, diamond paste, ceramic polishers |
Common Equipment
| Equipment | Purpose |
|---|---|
| Model vibrator | Reduce bubbles when pouring |
| Vacuum mixer | Improve stone and investment consistency |
| Model trimmer | Trim casts |
| Pinning machine | Create removable dies |
| Articulator | Simulate occlusion |
| Waxing tools | Build wax patterns |
| Burnout furnace | Eliminate wax before casting |
| Casting machine | Cast metal frameworks |
| Porcelain furnace | Fire ceramics |
| Press furnace | Press ceramic ingots |
| Micromotor | Finishing and adjustment |
| Steam cleaner | Clean restorations |
| Sandblaster | Surface treatment |
| Polishing lathe | Final polish |
Quality Risks In Conventional Lab Workflow
Conventional workflows are reliable when controlled, but every stage carries specific risks.
Common Workflow Risks
| Workflow Stage | Risk | Prevention |
|---|---|---|
| Impression receipt | Distortion, voids, missing margins | Inspect before production |
| Disinfection | Contamination or dimensional change | Use material-specific protocols |
| Cast pouring | Bubbles, weak stone, expansion error | Correct water-powder ratio and controlled mixing |
| Die fabrication | Damaged finish line | Trim carefully under magnification |
| Mounting | Incorrect occlusion | Verify bite stability |
| Waxing | Open margin or overcontour | Repeat die and articulator checks |
| Casting or pressing | Misfit, porosity, reaction layer | Follow processing instructions closely |
| Framework design | Weak connector or poor support | Respect material design rules |
| Ceramic layering | Chipping or shade mismatch | Use proper support and firing cycles |
| Finishing | Rough surface or altered contact | Apply systematic finishing steps |
| QC | Missed defect | Use written checklist and sign-off |
| Return to clinic | Breakage or wrong case | Package securely and verify identity |
Infection Control And Asepsis In The Lab
Infection control is not an optional side task. It is part of the workflow itself.
Key Infection Control Measures
A professional lab should:
- Treat all incoming items as potentially contaminated
- Wear appropriate PPE
- Disinfect impressions before pouring
- Separate receiving and clean production zones
- Disinfect restorations before return when required
- Document disinfection status
- Manage hazardous waste properly
- Maintain safety documentation and chemical records
These measures support both staff protection and regulatory readiness.
Conventional Vs Digital And Hybrid Workflow
Many modern labs now operate across conventional, hybrid, and digital systems.
Workflow Comparison
| Workflow Type | Process | Advantages | Limitations |
|---|---|---|---|
| Fully conventional | Impression to cast to die to wax to processing | Proven method with tactile control | Labor-intensive and technique-sensitive |
| Hybrid | Physical impression and cast with digital scan and CAD/CAM | Combines analog records with digital efficiency | Still depends on cast accuracy |
| Fully digital | Intraoral scan to CAD to CAM or printing | Fast, reproducible, easier file transfer | Highly dependent on scan quality and design settings |
Why Conventional Knowledge Still Matters
Even digital labs benefit from conventional understanding because technicians still need to recognize:
- Margin quality
- Occlusal logic
- Anatomical form
- Contour control
- Material behavior
- Fit principles
Digital tools can improve speed, but they do not cancel prosthodontic fundamentals.
Why Conventional Workflow Matters For Dental Lab Outsourcing
Conventional workflow remains highly relevant in dental lab outsourcing because many practices still use physical impressions or mixed analog-digital systems.
What Dental Practices Should Look For
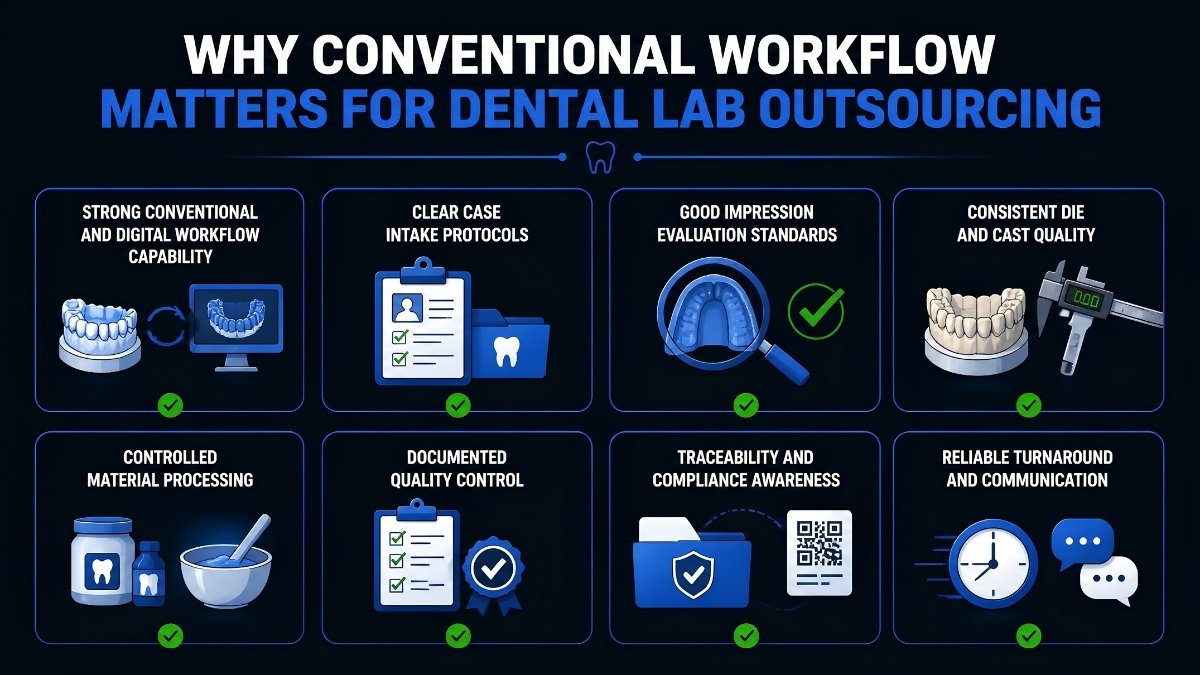
A reliable outsourcing partner should have:
- Strong conventional and digital workflow capability
- Clear case intake protocols
- Good impression evaluation standards
- Consistent die and cast quality
- Controlled material processing
- Documented quality control
- Traceability and compliance awareness
- Reliable turnaround and communication
Where XDENT LAB Fits
For dental practices seeking a Vietnam dental lab or lab-to-lab service partner, XDENT LAB’s value lies in combining scalable production with disciplined process control. That includes:
- Certified technicians
- State-of-the-art technology
- Support for fixed, removable, and implant workflows
- FDA and ISO-aligned standards
- Capacity across two factories
- Quality consistency for U.S.-market expectations
This is particularly important in conventional and hybrid workflows, where small procedural variations can create significant downstream effects.
Key Takeaways
Conventional lab workflow in fixed prosthodontics is a structured chain of technical steps that transforms a clinical impression and prescription into a patient-specific restoration. The process includes impression intake, disinfection, cast and die fabrication, model mounting, waxing, material processing, framework building, ceramic shaping, finishing, quality control, and return to clinic.
Its success depends on accuracy, discipline, and consistency at every stage. Even as dentistry becomes more digital, the conventional workflow remains essential because it teaches the core principles of fit, margin control, occlusion, contour, and biological compatibility. For dental practices working with outsourcing partners, choosing a laboratory that understands both traditional craftsmanship and scalable process control is one of the best ways to ensure reliable restorative outcomes.
Share this post:
Related Posts
Discover the top 5 Vietnamese dental labs leading in international outsourcing and export in 2026, their specialties, certifications, and how to choose the right dental lab partner.
Discover how the lab-to-lab model in the dental lab industry supports scalable production, specialized workflows, quality control, and efficient outsourcing solutions.
Explore the traditional and modern dental lab industry, including key differences, digital trends, materials, workflows, and outsourcing benefits for dental practices.

